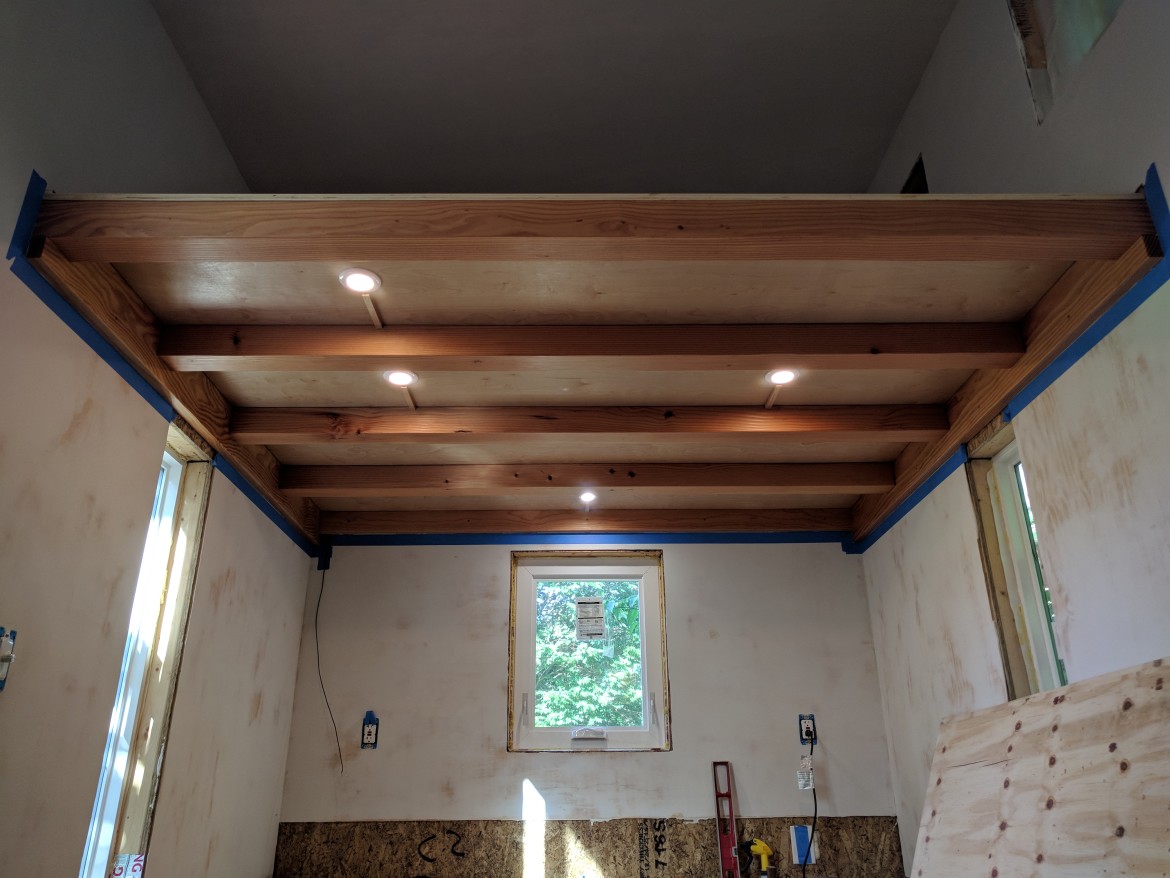
This tiny house’s power needs are low enough that it can be powered by an extension cord, but can also handle a 240V direct connection to a main panel for more power if needed in the future.
SIP electrical rough-in
The electrical system had to be fully planned before ordering the SIPs. Unlike traditional stick-frame structures, a SIP building’s electrical layout is not easily modified after the design phase. Internal electrical wire chases are manufactured into the panels according to the designs, and adding more later is painful because you can’t cut the OSB skin without negating the panel’s strength.
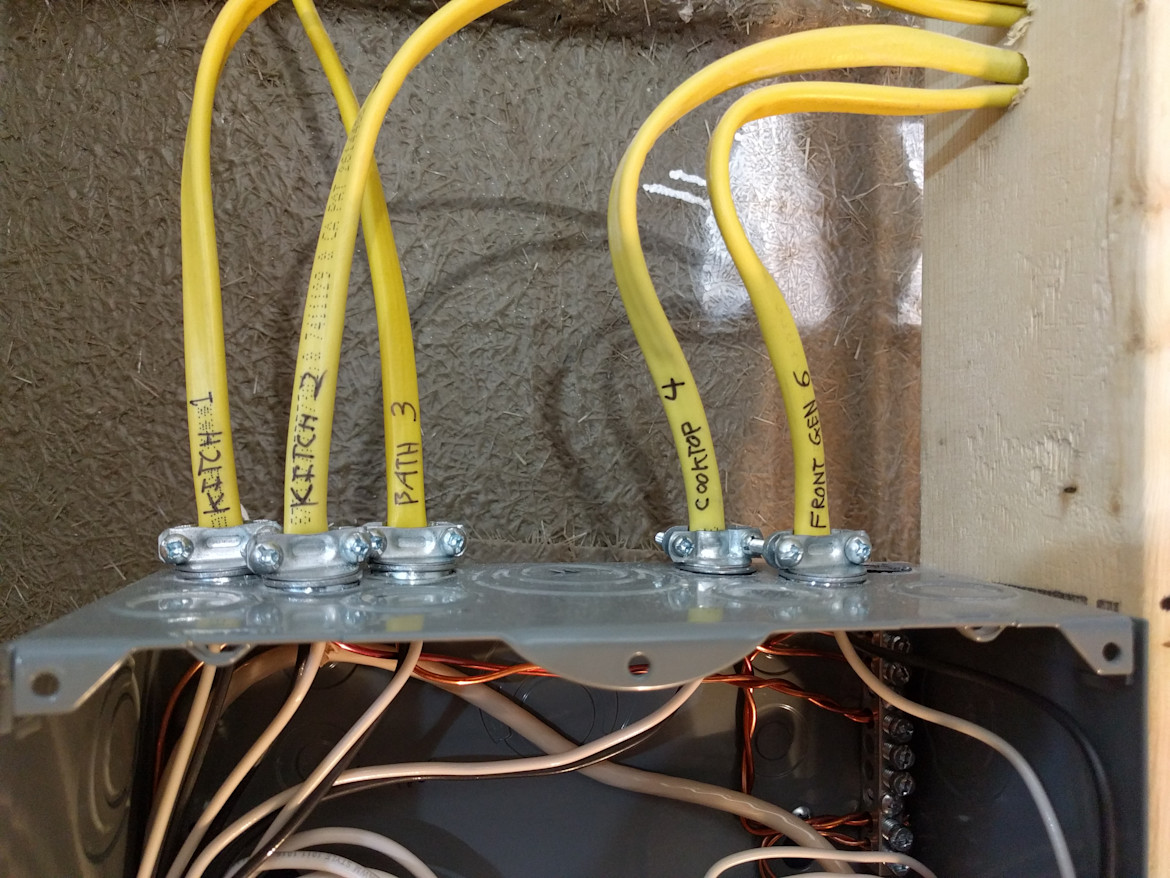
Electrical rough-in involved drilling holes through the OSB into the chases at both ends of each electrical run and pulling Romex through with fish tape.
Electrical rough-in in the SIPs.
Power supply
I’ve tried to design the electrical system to be compatible with a multiple power supply options. From simply plugging the house into an electrical outlet (tiny-house-as-an-appliance setup), to wiring a permanent connection to a main panel, to plugging into a camper electric service pole.
This flexibility is possible because the power demands of the house are low and the system’s hardware can handle higher loads than it presently requires.
Tiny house as an appliance: 20A 120V
Keeping the power requirements of the tiny house minimal allows me to plug it in to an outlet as if it’s just an appliance. Currently I’m powering everything with an extension cord to a 20-Amp outdoor outlet.
Some of the decisions/appliances that keep the power demands low:
- 2-burner induction cooktop: This modest cooktop draws a max of 15 Amps at 120V. It’ll be a struggle to cook an 8 course feast, but this cooktop should be enough for 1 to 2 people, and it doesn’t require more power than a standard extension cord can supply.
- Propane tankless water heater: An electric tankless water heater is a power guzzler (on the order of 12K Watts for an application like this) that would necessitate a serious electrical supply (50A 240V). I decided the convenience of the tiny-house-as-an-appliance setup was worth the added pain of installing a electricity-sipping propane heater.
- LED lighting: All the lights are dimmable LED. The whole system uses about 48 Watts at 100% brightness.
- Energy-concious behavior: Even with low-power appliances, one could still easily exceed the 20-Amp allotment if they aren’t careful. Turning on both stove burners and simultaneously firing up an electric kettle (all while the range hood, minisplit, fridge, and lights are on) would already exceed 20-Amps. This would mean a walk over to reset the breaker at the main panel before continuing breakfast, this time making the coffee first before starting the eggs and pancakes on the stove. If one is willing to live conscious of their energy usage like this, the tiny-house-as-an-appliance setup could work permanently.
My setup
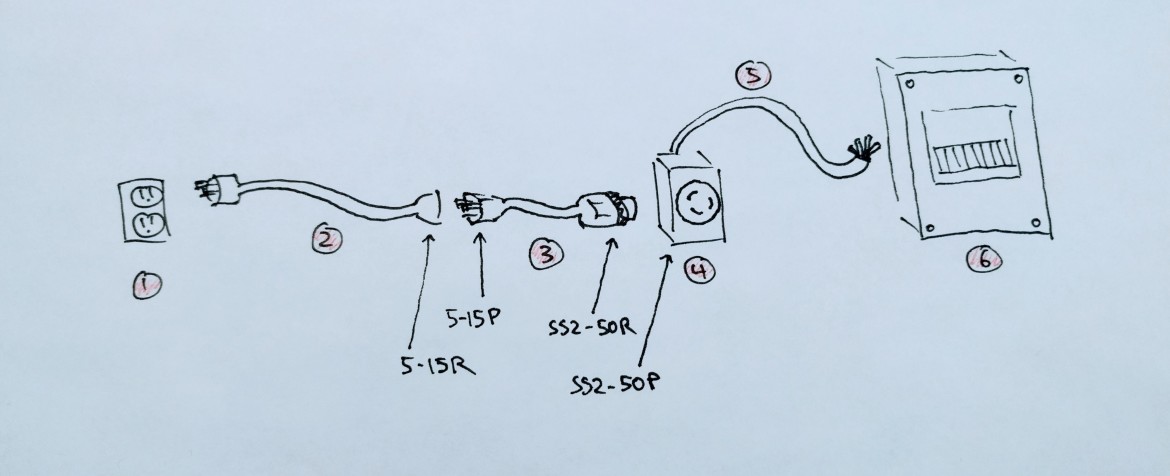 Feeder hardware. Components labeled and detailed below.
- Outdoor outlet on the main house: 1-pole 120V. In my setup this outlet is on a 20-Amp circuit.
- Extension cord. Mine needs to run about 100 feet, so I made my own out of 10-2 wire (thicker than a typical extension cord) to prevent excessive voltage drop.
- “Dogbone” connector: This serves 2 functions. First as an adapter connecting the receptacle end of the extension cord power inlet box twist-lock plug (plug/receptacle NEMA codes labeled in the diagram). The second function is splitting the 120V 1-pole circuit from the extension cord across both hot conductors of the power inlet. This is the key to having 2-pole 240V compatible hardware in the tiny house but powering it with a 1-pole 120V extension cord. I’m actually doing a not-great thing by using this dogbone as it is only rated for 15 Amps, but since I’m just building and testing at the moment that is all I draw. What I should do, if I continue this setup permanently, is terminate my extension cord with a TT-30R plug and use a 30-Amp dogbone that would be sure to handle the full 20-Amps I could draw.
- 50-Amp power inlet: This is the first component that is a permanent part of the tiny house (it’s mounted to the underside). The system can handle 50A 240V from this component on.
- 6-3 wire: 6 gauge 3 conductor (+ ground) NM cable connects the inlet plug to the electrical panel.
- Electrical panel: I’m using a 6-space panel that’s rated up to 100 Amps. This takes the incoming power and branches it out to my circuits, with a breaker at each branch for protection. I’ve wired the panel as a subpanel, meaning the neutral and ground are separate.
Getting more power
While I’m pretty confident the current 20A 120V setup is sufficient (assuming some energy-concious behavior), I designed the system so 50A 240V power is an easy possibility. This could be quite useful someday if the small cooktop is too inconvenient, or one wants to stop messing with propane and would prefer an electric water heater.
To get more power one will need to connect to a breaker on the main panel.
- Single pole (120V): It seems 30-Amps is the max 120V hookup one could achieve. I’ve only seen dogbone adaptors up to 30-Amps.
- Double pole (240V): This is to get a lot more power. Connect to a 15, 20, 30, or
even 50 Amp 2-pole breaker at the main and run an appropriately sized cable terminating in a
NEMA SS2-50R plug out to the power inlet on the tiny house.
P = IV, so a 50A 240V setup one can deliver 12K watts – 5 times the wattage of my current 20A 120V setup.
Wiring the panel and testing the circuits.
Circuits
Here is how the circuits are organized in the tiny house:
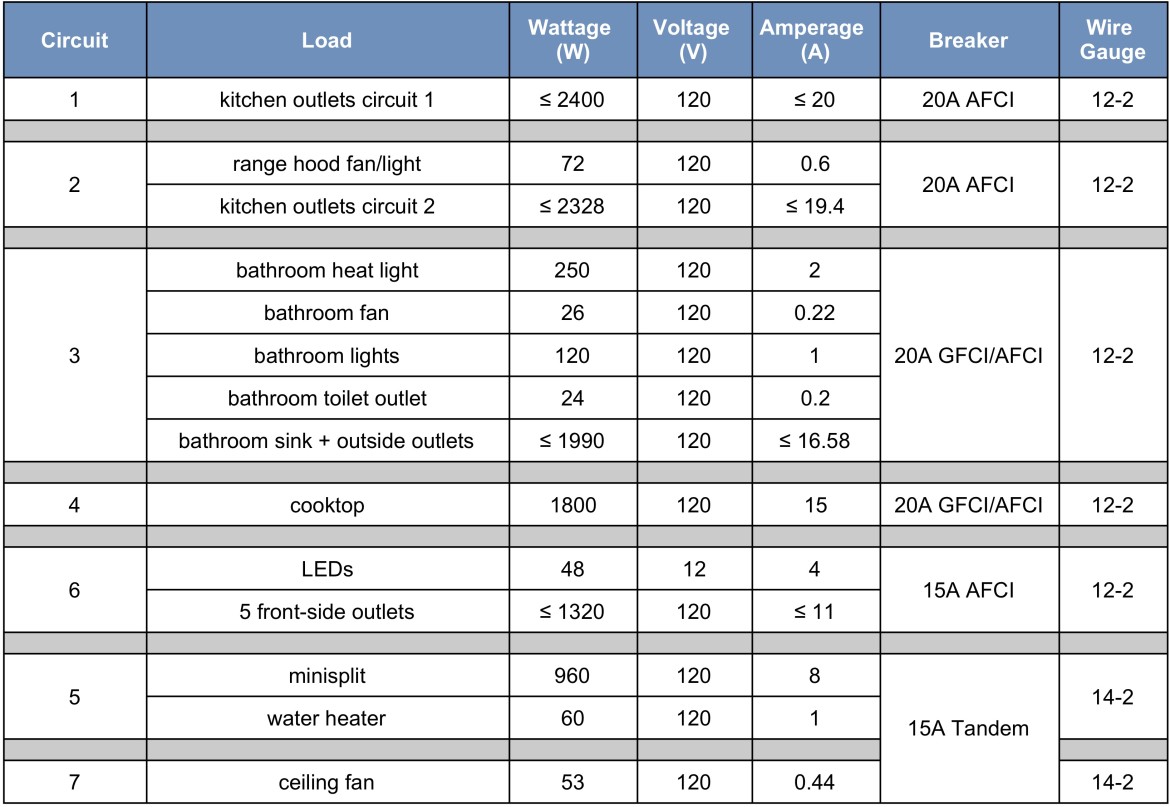
Here are links to the breakers I used: 20A AFCI. 20A GFCI/AFCI. 15A AFCI. 15A Tandem.
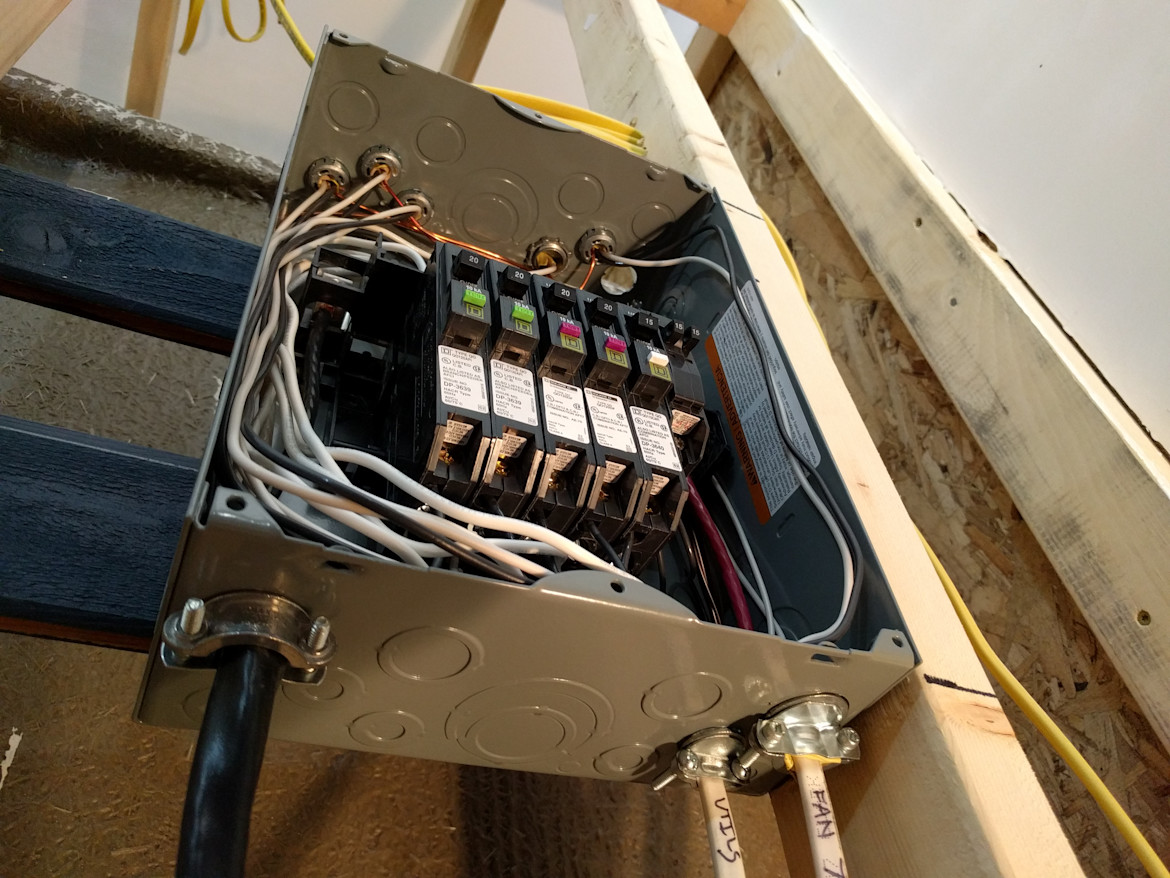
Electrical panel close ups.
Code And Safety
Full Disclosure: I’m not an electrician, nor has my work been officially inspected for compliance with NEC codes. I’ve done my best to research and follow electrical codes, built in some extra safety measures, and had an unofficial inspection of my panel and rough-in by an electrician. I’ve also been using the system daily for many months with zero fires or deaths!
Some misc notes:
- Grounding: In addition to the connection back to the main panel’s ground via the feeder cable, my electrician friend recommended adding a grounding electrode at the tiny house subpanel. I ran a 6-gauge wire from the subpanel’s ground bar out through the floor that can be attached to a grounding rod when the tiny house comes to its permanent location. The propane system’s CSST and the metal trailer frame are both bonded to the system ground.
- Wire gauge: I’m using 12-gauge wire everywhere (except some sections of the low voltage LED System) even though none of the circuits draw more than 15 Amps. Only 14-gauge wire is required in that case, but thicker wire ⇨ less resistance ⇨ less heat ⇨ more safety in case of an unexpected power draw.
- Ground Fault + Arc Fault protection
- GFCI: Ground fault circuit interrupters protect people from electric shock. Their sensor monitors that all current flows from hot to neutral. If that is not the case, it means the electricity is taking another return path (such as a person’s body – ouch, or dead), and the GFCI shuts off the circuit. GFCI is required by code in wet areas like bathrooms and kitchens. I’ve installed GFCI outlets in the kitchen, and in the bathroom used a GFCI breaker for protection of the whole circuit.
- AFCI: Arc fault circuit interrupters are a fire prevention measure. They detect and prevent unwanted electrical paths and the extreme heat produced along those paths. AFCI is required by code to protect all receptacles in dwelling areas.
I’ve also attempted to slog through the IRC and NEC code books, but they’re quite hard for a layperson to decipher. Instead I’ve mostly relied on summaries of the key safety points of electrical code (one useful summary here) so I’ve followed the spirit, if not the letter, of the code.
LED Lighting
I used Armacost LED lighting. I learned about their products through shedsistence and it so happends the company is based near me in Baltimore, which is cool. They have plenty of documentation about how their systems work, but some things I think are worth mentioning about their 12V DC system:
- Their LED lights run on low voltage 12V DC current. So you need to convert the 120V AC to 12V DC with their power supply bricks (rectifiers).
- At low voltages like 12V, voltage drop is a more pronounced issue. I used thick 12-gauge wire for most
of the LED wiring, not for safety (there isn’t safety code around 12V circuits as the voltage
is too low to shock people or cause fires) but to cut down on resistance and therefore voltage drop
(
V = IR). - If 12V DC wiring and 120V AC wiring run in parallel, the cycling of the AC current can induce flickering in the LED lighting. One must layout the wiring so there is always 6” between DC and AC wires, and where they must come close they should cross perpendicularly.
